Getting started
Install and open Maestro
Use the installer for your operating system:
- macOS: open the DMG, then move Maestro Studio to Applications.
- Windows: run the MSI or NSIS installer and follow the prompts.
- Linux: use the AppImage or DEB package supplied for your distribution.
On first launch, Maestro opens a local workspace. Provider credentials, messaging tokens, SSH credentials, and similar secrets are not included in projects and must be added on each computer that needs them.
If you are upgrading from 1.4 or earlier, install 1.5 once with the normal installer. After that, the signed in-app updater can handle later releases.
Learn the desktop layout
The primary navigation on the far left opens every major product area. The top bar shows the active project and workflow, global search, save state, and run actions. The center changes with the selected product area.
The Workflow screen uses four coordinated panels:
- The component tree on the left lists workflows, nodes, models, and routes.
- The canvas in the center is the visual workflow.
- The inspector on the right edits the selected component.
- The bottom panel shows activity, problems, quality details, and terminal sessions.
The tree and canvas remain synchronized: selecting a node in either place selects it in the other. Maestro remembers the workspace layout per project.
Use global search and the command palette
Choose the search box in the top bar or press Command-K on macOS / Ctrl-K on Windows and Linux. Search can open major screens and run common actions without navigating through menus.
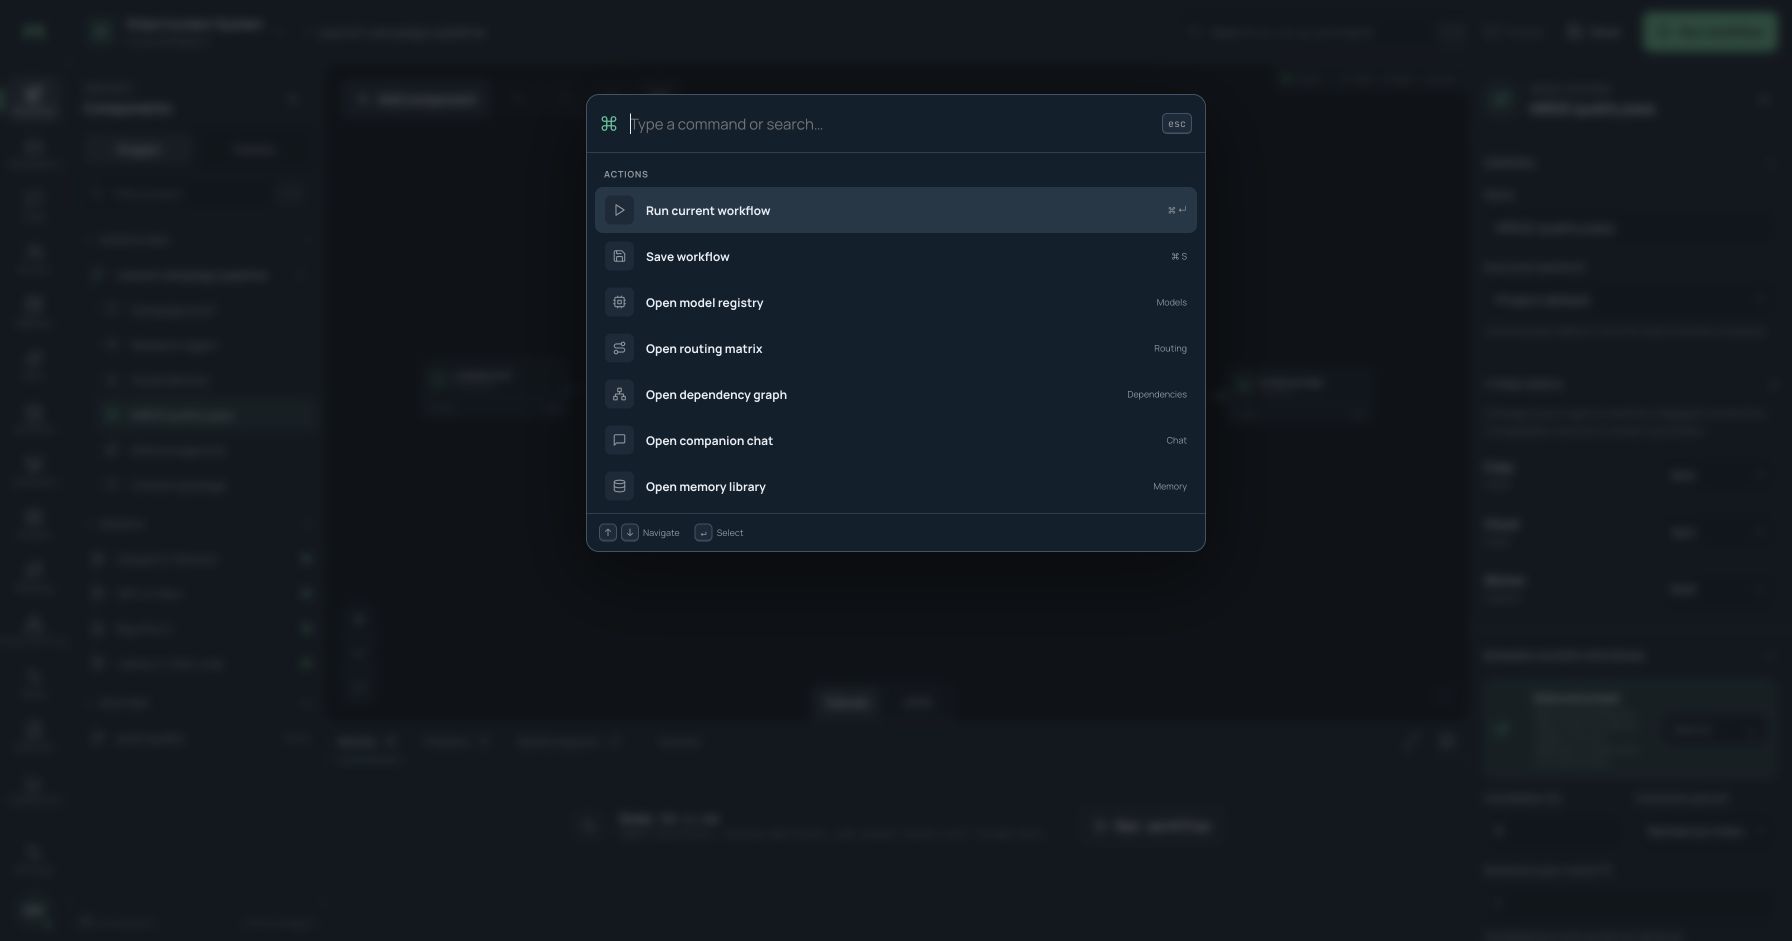
Common commands include running or saving the current workflow, opening models or routing, viewing dependencies or runs, and opening chat, memory, skills, and automations. Shortcut assignments can be changed under Settings → Shortcuts.
Create or open a project
Choose the project switcher in the top bar, then choose one of these actions:
- New project creates an empty local project folder.
- Open project selects an existing Maestro project folder.
- Import bundle restores a portable project or workflow bundle.
A project can contain several workflows, reusable sub-workflows, named routing matrices, model references, variables, MRGD presets, and run history. Project files are readable and suitable for normal version control. Secrets, global memory, and user-profile memory are excluded from exported bundles.
Use the project switcher to move between recently opened projects. The component tree shows a changed-files indicator when the folder differs from its version-control baseline.
Set appearance and accessibility
Open Settings → Appearance to choose a light, dark, or system-matched neutral theme. The app honors operating-system scaling and high-density displays. You can also reduce motion and adjust interface density where available.
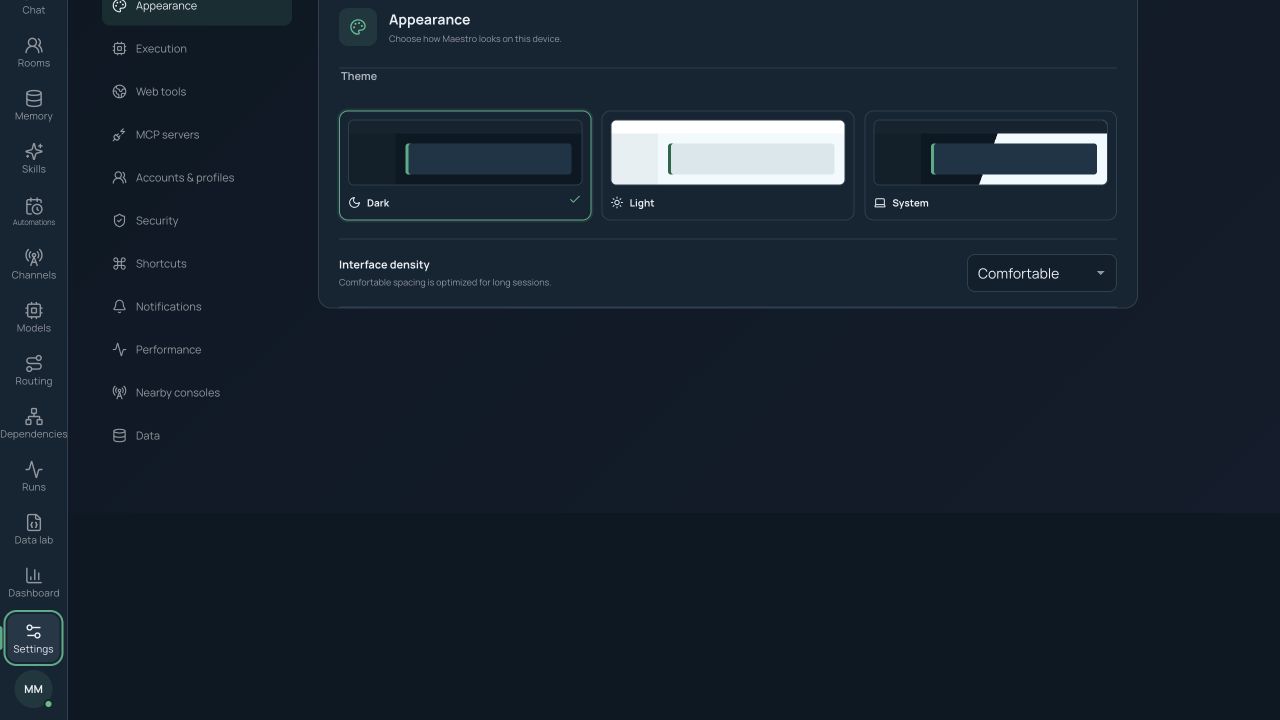
Keyboard focus remains visible throughout the interface. If animations are distracting, turn on reduced motion before working with the live canvas and activity views.
Add a first model
Open Models, then choose Add model. Give the model a display name, select its provider, enter the provider model identifier and endpoint where needed, and declare its capabilities. Add context size, default parameters, cost, rate limits, and tags if you want routing to use them.
Save the credential to the credential pool, then choose Test connection. A successful test confirms the endpoint and credential with a minimal call and reports latency. See Models and providers for built-in adapters and bulk discovery.
Create a first route
Open Routing, choose a task type such as text generation, and select the new model as the primary route. Add an ordered fallback if another compatible model is available. Use the routing preview to confirm which rule would match without spending on a real request.
Build and run a first workflow
Return to Workflow and choose Palette. Add an Input, Model Call or Agent, and Output. Connect ports with compatible types, then configure the selected node in the inspector.
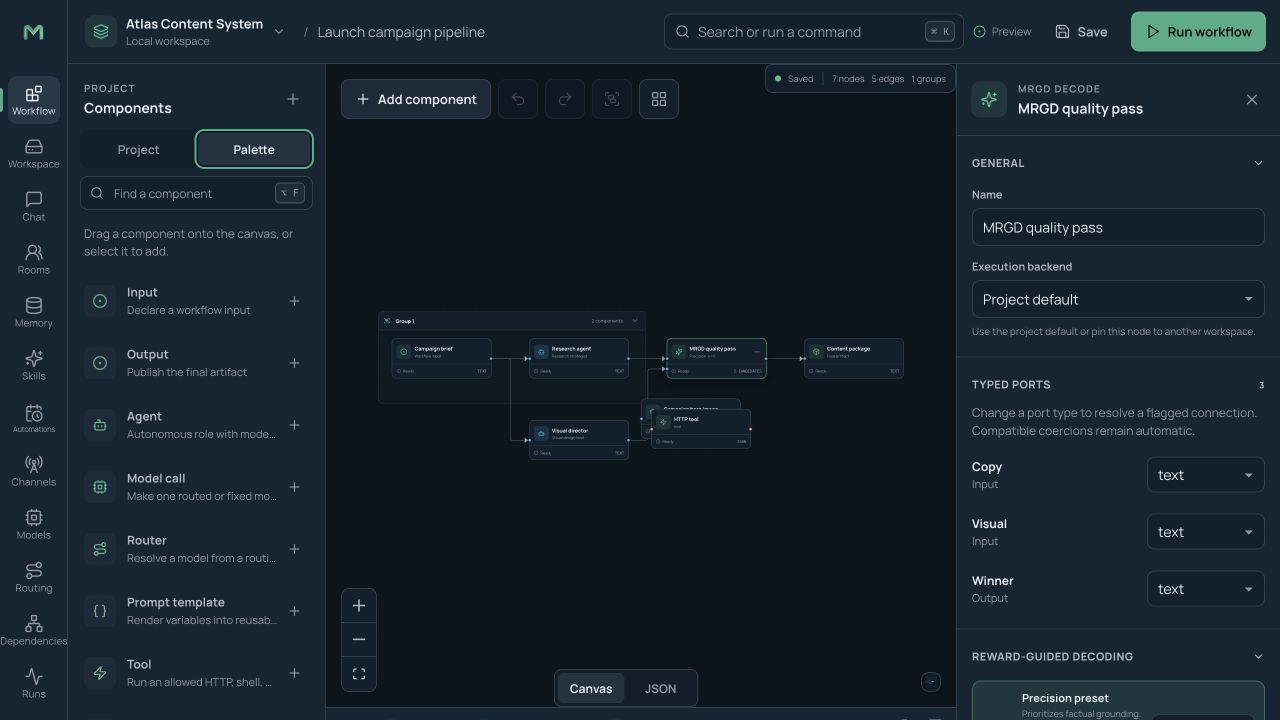
Before the run begins, Maestro checks for missing fields, unresolved references, incompatible connections, and illegal cycles. Fix anything shown in Problems, then choose Run workflow. The Activity panel shows progress; the run view records routing, model use, time, cost, outputs, and errors.
For a safe first run:
- keep shell and file-write tools disabled;
- set a small cost or token budget;
- use a local model when privacy matters;
- add a Human Approval node before any privileged action;
- inspect the route preview before sending sensitive content to a hosted provider.
Save, recover, import, and export
Maestro auto-saves project edits and keeps crash-recovery state. The top bar shows whether the current workflow has saved changes. Save writes immediately.
Use project export for transfer or backup. Credentials are always excluded, so the destination computer will ask for them. A single workflow can also be exported and imported into another project. If a workflow references a model or skill that is missing at the destination, Maestro lists the unresolved references instead of silently substituting them.
Check for updates
Open Settings → Data & updates and choose Check now. If a signed release is available, Maestro shows its version and release information. Choose Install and restart when ready. The app downloads with visible progress, verifies the release signature, and restarts only with your approval.
Automatic check timing depends on the installed build:
| Channel | Check interval |
|---|---|
| Alpha | Every 4 hours |
| Beta | Every 6 hours |
| Stable | Every 24 hours |
An available update remains visible until handled. Automatic checks also recover correctly after sleep or focus changes without repeatedly checking on every launch.
If the app does not open or a screen is empty
- Confirm that the installed package matches your operating system and processor.
- Reopen the app once to restore the auto-saved workspace.
- Switch to another product area, then return to the screen.
- Open Settings → Performance to check service and backend health.
- If the problem is project-specific, export a safe copy before changing files.
- For service or remote-console problems, run the diagnostics described in Administration and operations.